Please click the images below to view more information
DISCLAIMER: Independent professional contractors who install our products are not our employees or official representatives. We do not warranty the installation services of the contractors. We are not responsible or liable for installation services provided by professional contractors and any contract for installation services is with the professional contractor alone.

Be sure to repair your gutters and clean our any leaves and debris before installing Total gutter guards.
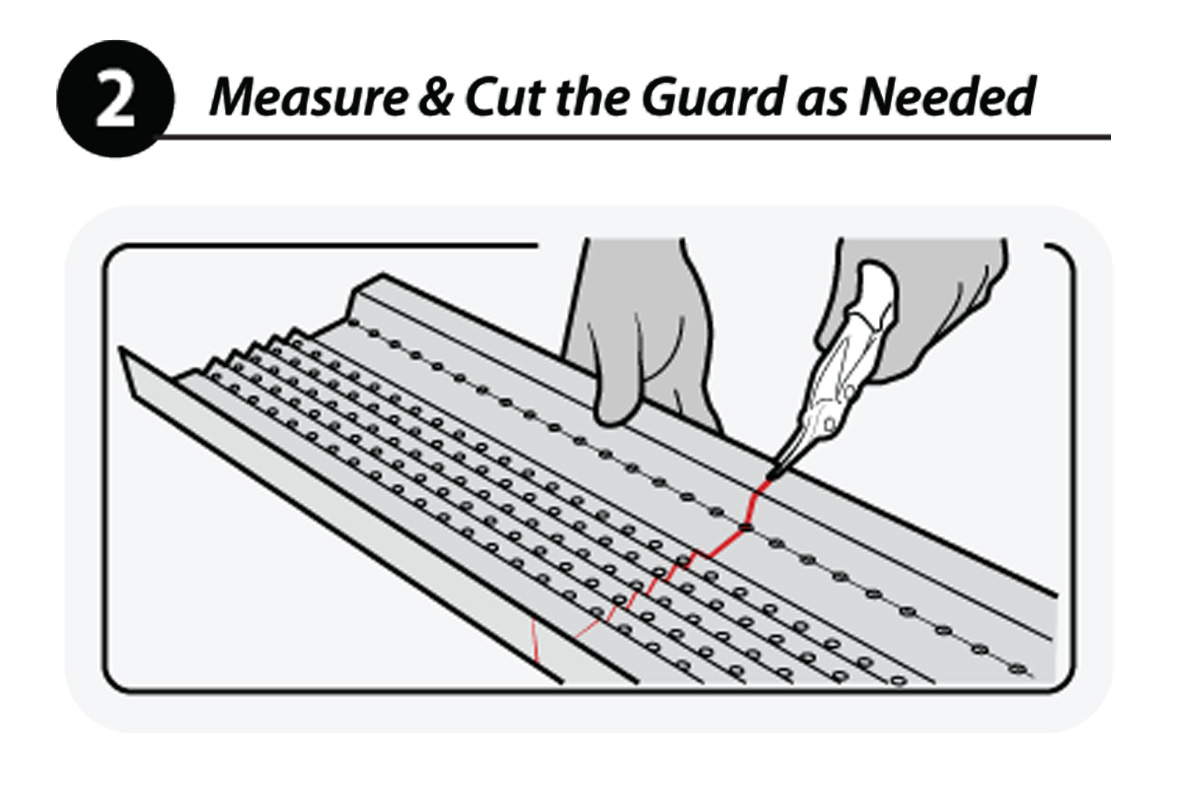
Use a new, or freshly sharpened pair of tin snips or a dremel to cut through the guard as needed. Not every piece of guard needs to be trimmed, only make cuts to end pieces to fit the length of the gutter. For safety, use protective gloves and make cuts while on the ground.
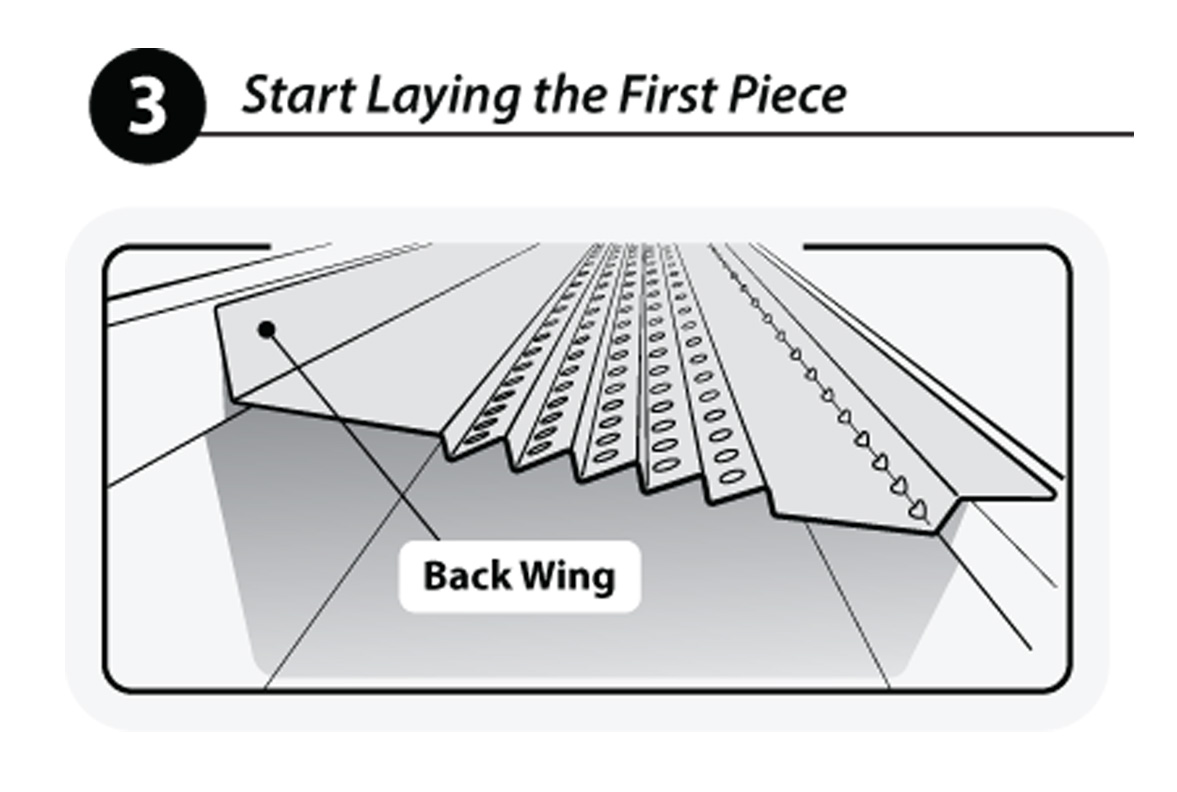
Drop the guard into the gutter with the front edge of the gutter guard resting on the front lip of the gutter. The guard is designed to rest on the gutter braces/brackets with a gradual upwards slope towards the house.

Using the provided 1/2 inch screws, secure the front edge of the guard to the gutter at both ends using the pre-drilled screw holes (3 inches from each end). Use 2 additional screws to fasten the front edge of the guard to the gutter.
Next, secure the back wing of the guard in place using the same screw pattern as used on the front edge. Note: 1 inch screws may be necessary here if you have difficulty securing with the provided 1/2 inch screws.
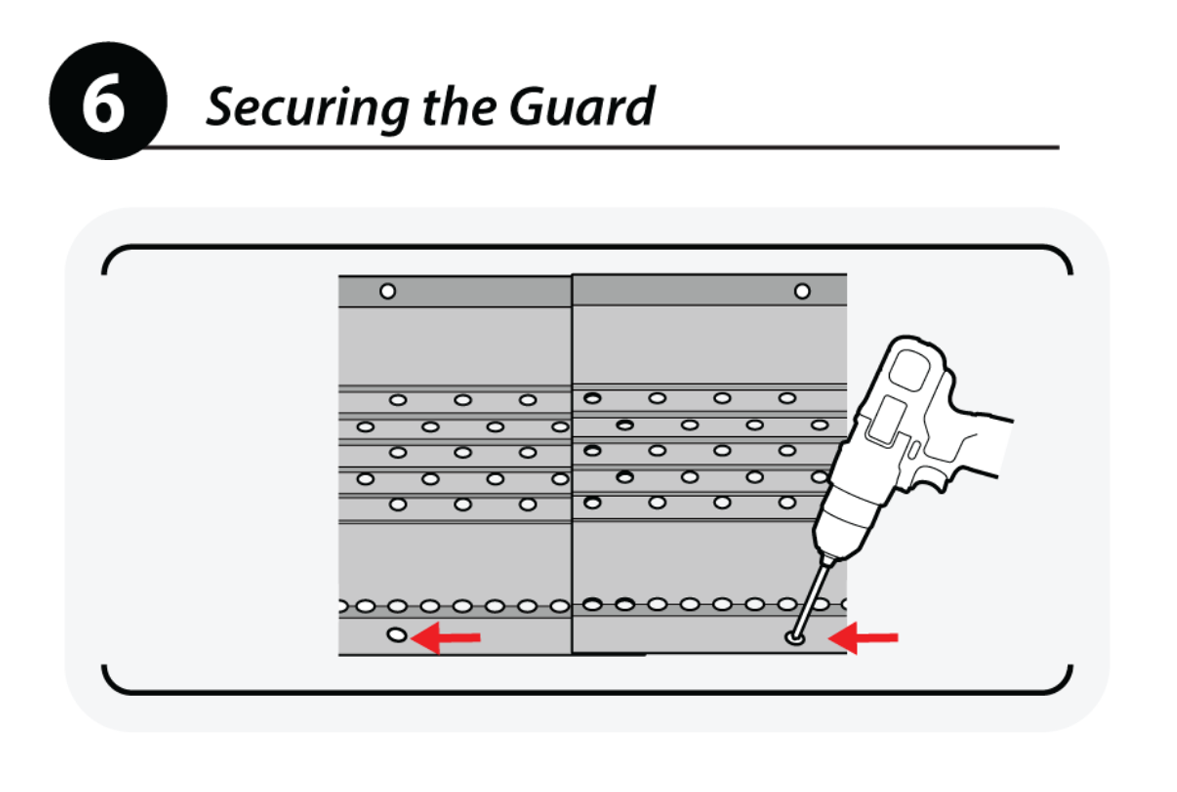
Overlapping pieces should create a seamless finish.
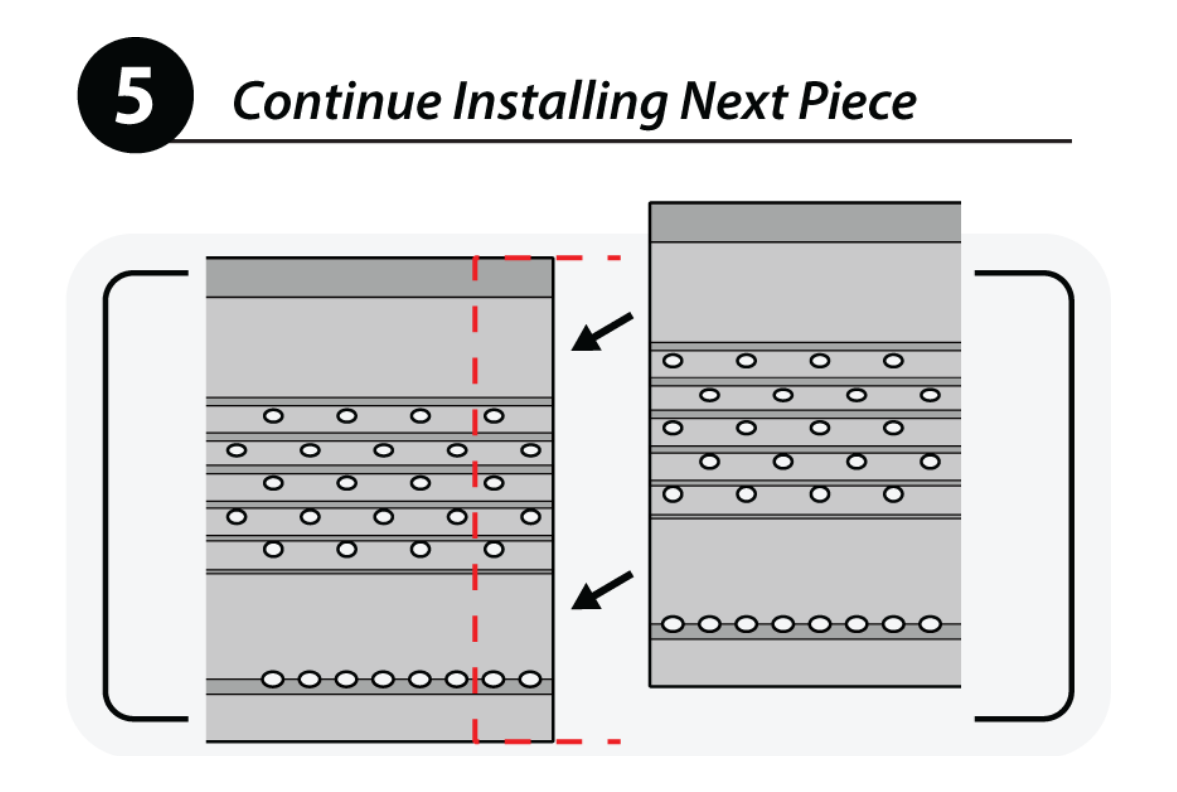
Slightly overlap the next guard so the perforated holes align with the previous piece. Follow the same screw pattern as the previous piece.
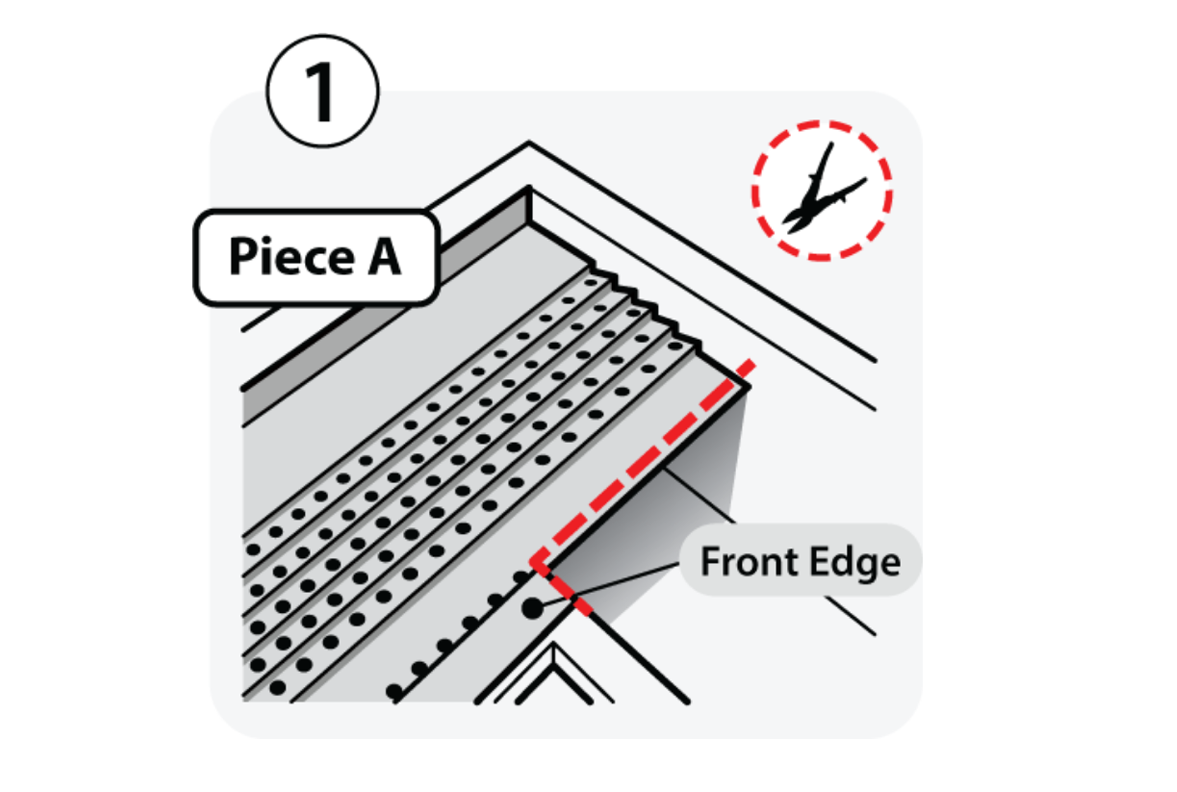
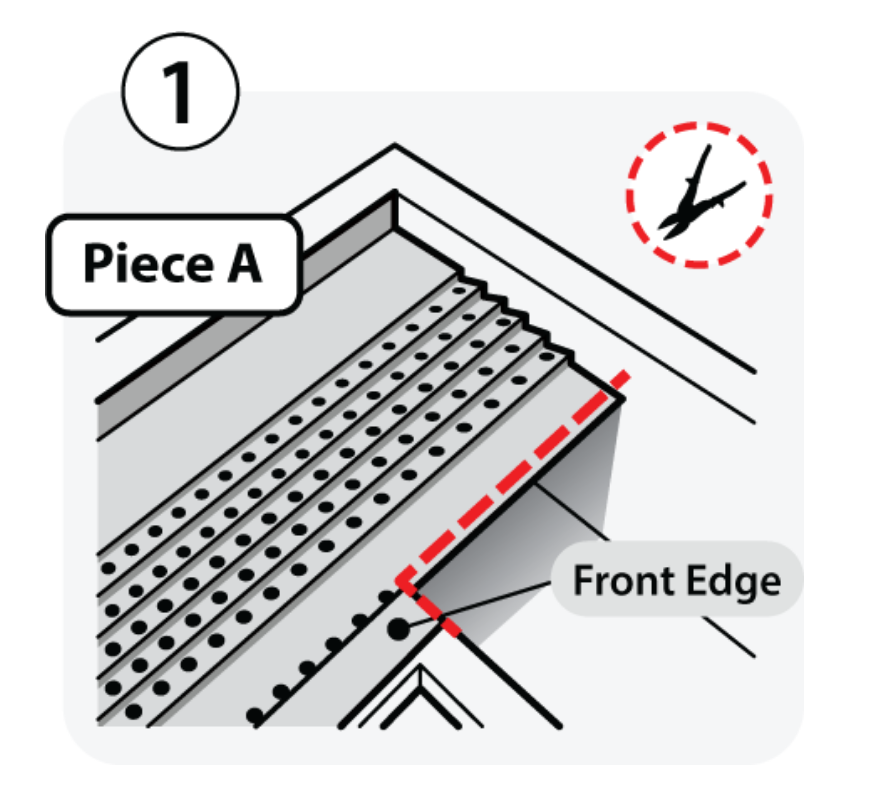
Trim the front edge of Piece A as shown in Image 1. Use the drain holes in the trough as a cut line. This will allow Piece B to fit properly atop Piece A.
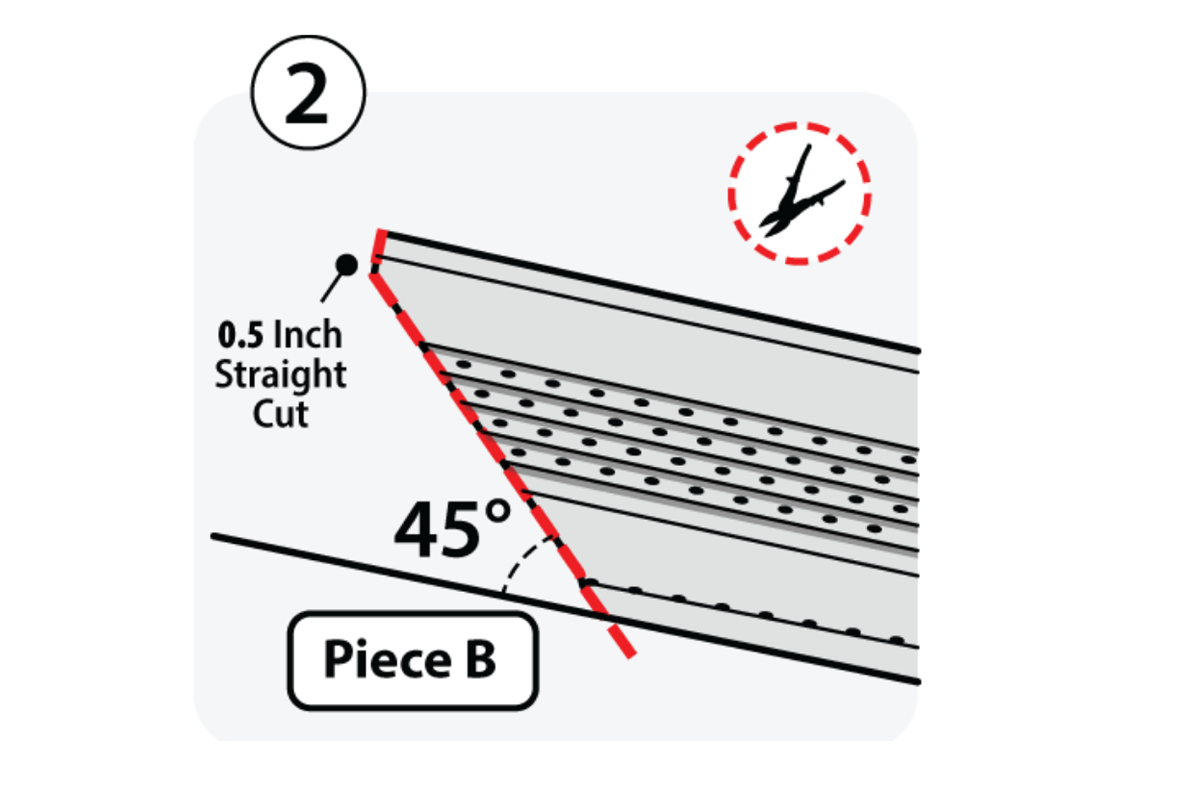
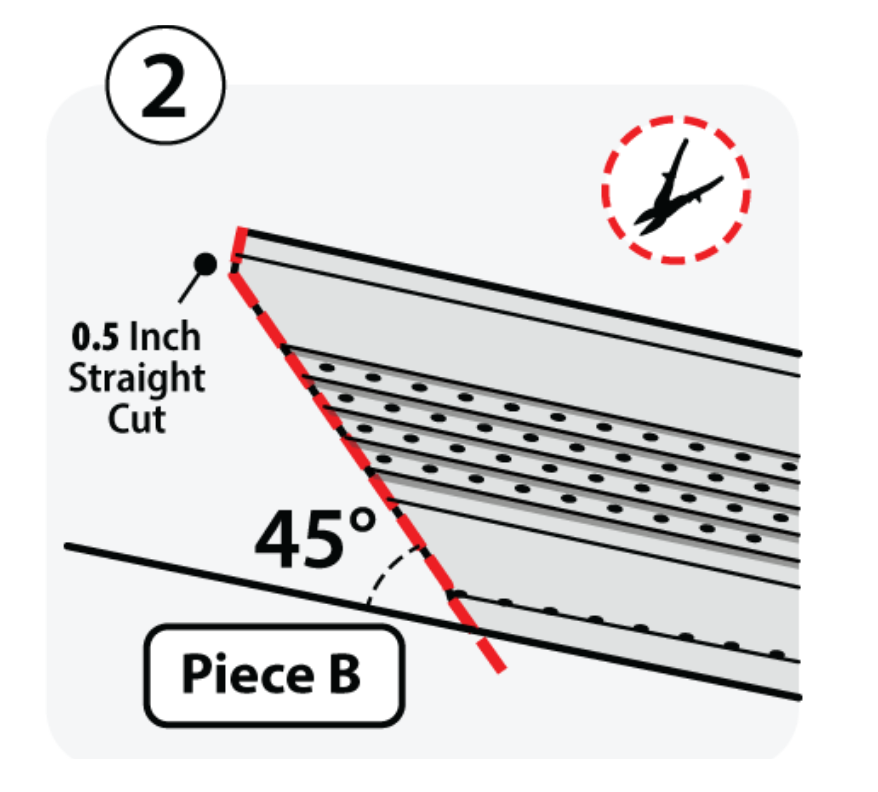
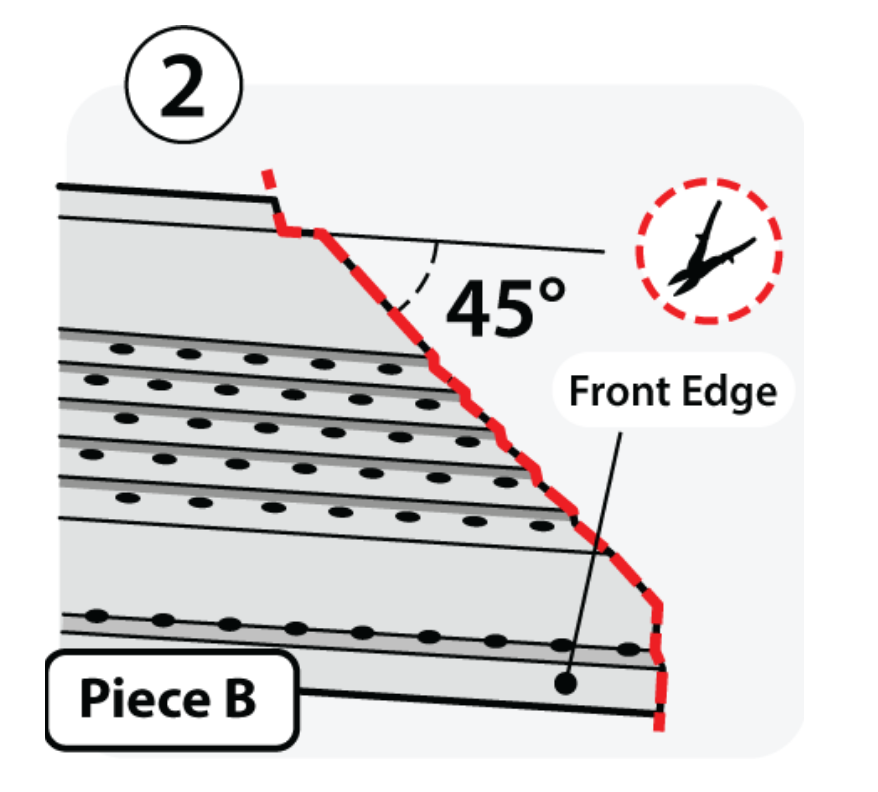
Cut the end of Piece B at 45 degrees. Next, notch the edge of the back wing in a 1/2 inch straight line. Place Piece B atop Piece A and check that the alignment has no gapping.

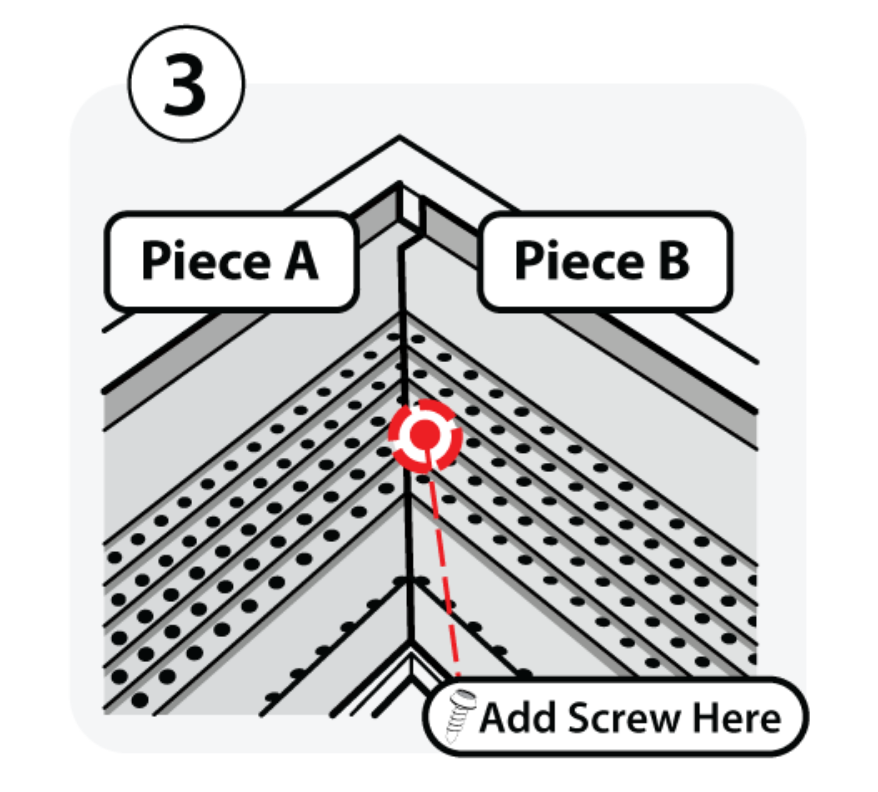
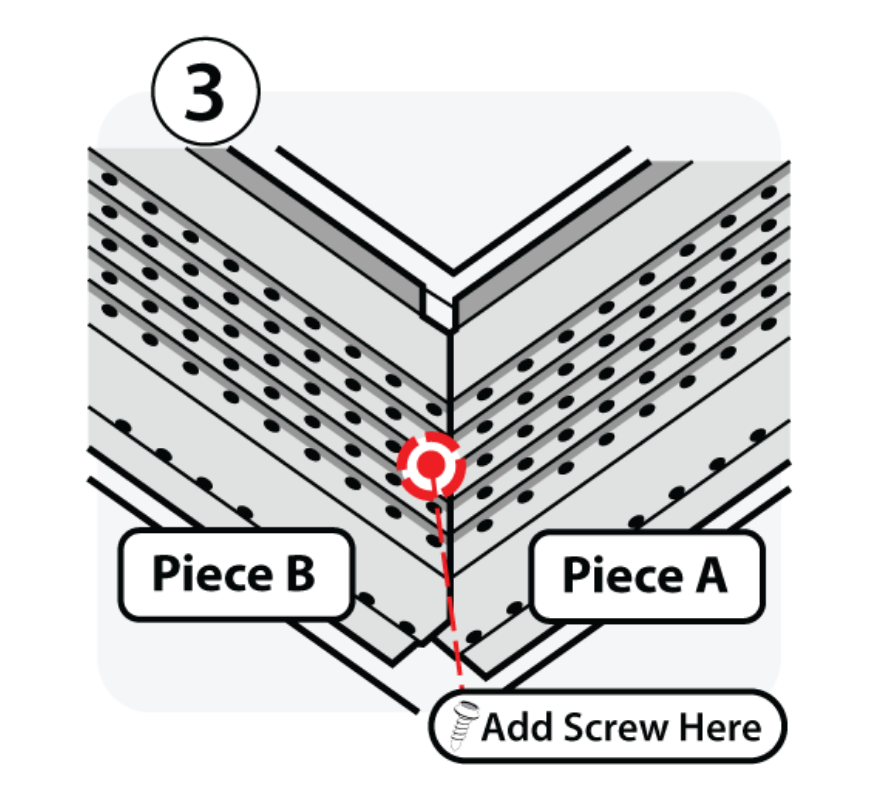
A completed inside corner should look like Image 3. Piece B should rest atop Piece A creating a seamless miter. For a tighter seal, place a screw through Piece B into Piece A to pull the pieces together.

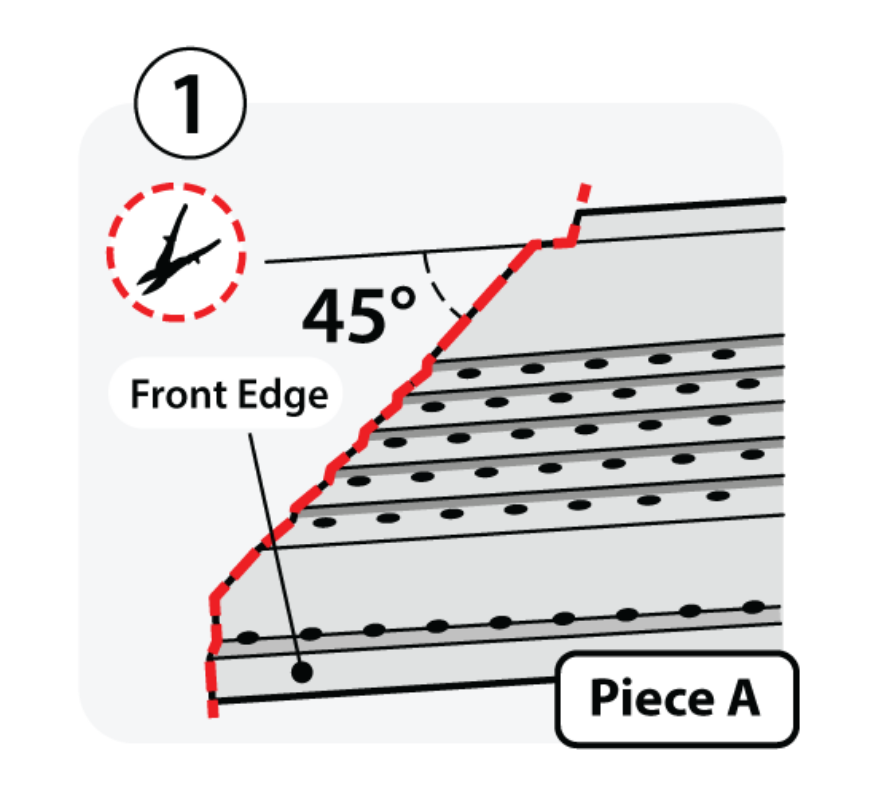
Cut the end of Piece A at 45-degrees. Next, cut a 1/2 inch wide notch from the back wing. Then, trim off 3/4 to 1 inch from the front edge in a straight line.
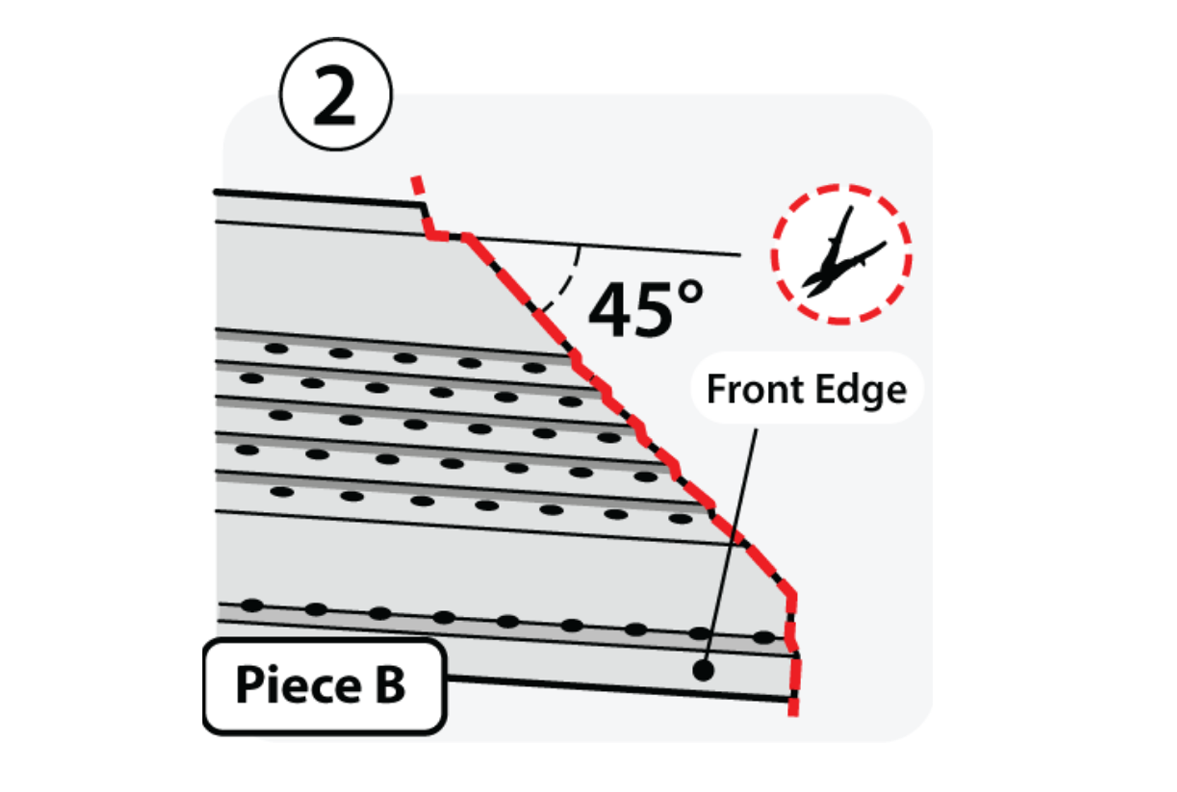
Cut the end of adjoining Piece B at 45-degrees. Repeat the 1/2 inch wide notch cut on the back wing and the 3/4 to 1 inch trim from the front edge. Pieces A & B should slightly overlap.
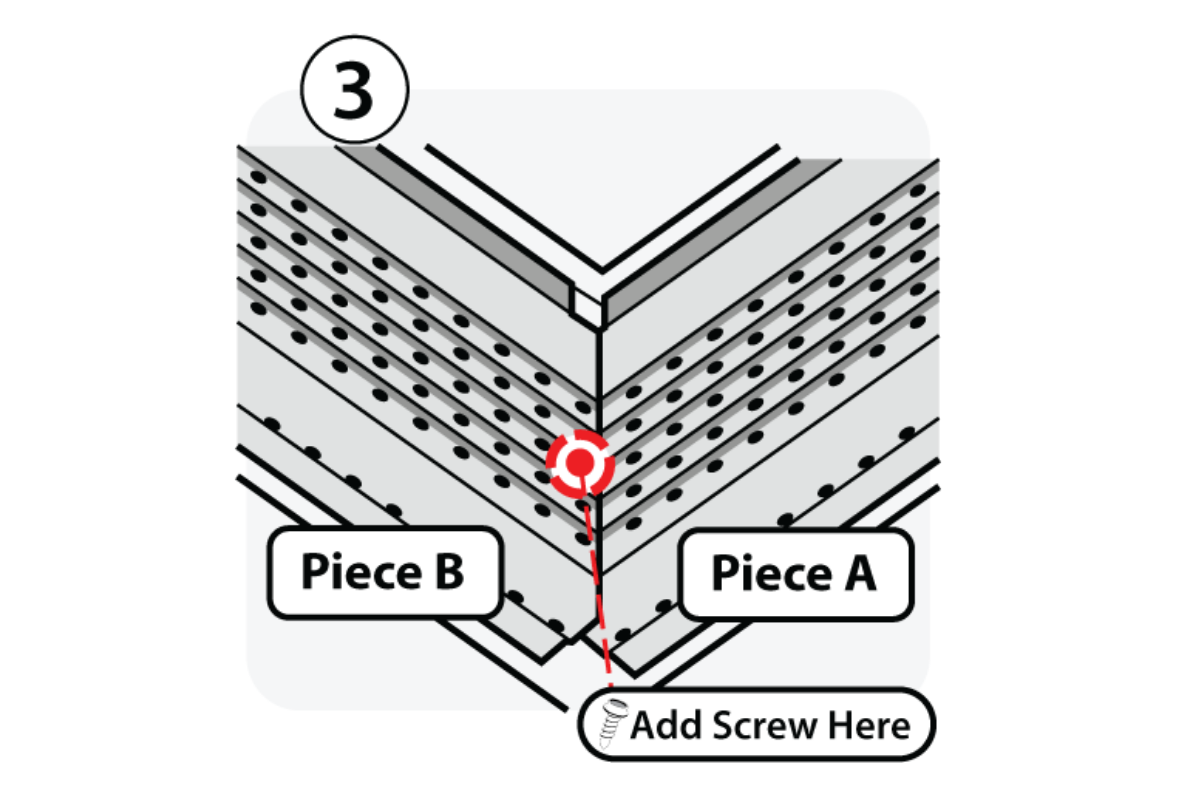
A completed outside corner should look like Image 3. For a tighter seal, place a screw through Piece B into Piece A to pull the pieces together.


